Google Calendar (including through Google Apps usage) makes it easy for users to share calendars and events/appointments Internally. But what when your workflow requires you to share calendar events with external addresses? these are anything other than name@yourgoogleappsbusiness.com and the process has two options.
Option 1 - Occasionally included in calendar events
- If you only want to include the occasional external attendee in a calendar event, simply click Create.
- When you get to the Add guest field (pictured below), just add the recipients email address to include them in this one calendar event.

Option 2 - Having a permanently shared calendar
- Get your Google Apps Authorised Reseller to alter the apps settings in accordance with "shared calendar, external associates"
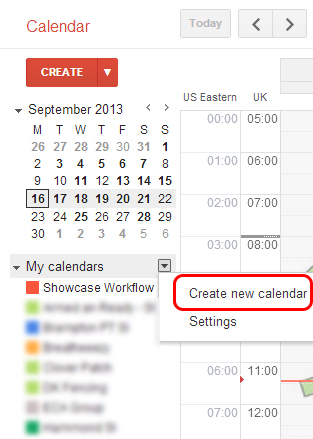
- Create a New Calendar in the My Calendars section on the left side of the screen.
- Complete the Calendar name (viewable by both parties), Description and Timezone details
- At the bottom of the New Calendar screen find Share with specific people, and this is where you'll add the person you wish to share the calendar with.
- Please ensure step one has been carried out otherwise after adding a person the permissions will default back to See only free/busy (hide details)
- Once you have entered your chosen option in the dropdown list you may add the recipients email address in the left side of the same screen area (4#). This in an auto fill field, so if you have emailed the person before, their address should pop up during tying.
- Lastly, you can press the Add Person button back over on the right side of the screen again.
You and the recipient will now be able to share data throughout a shared calendar until one of you makes a break. Points to note:
- You can change the colour of your shared calendar by hovering over the name of the calendar in the left side area of the main calendar view.
- Do not change the calendar name unless both/all parties agree on this as all instances of the calendar name will be changed, across all users!
There are a few images below to assists with this process.
2#

4#